Installing Apache, PHP, MySQL and phpMyAdmin from XAMPP
XAMPP is an all-in-one package that you can use to install Apache, PHP, and MySQL. XAMPP also installs phpMyAdmin, a Web application used to administer MySQL. XAMPP installs all the packages in one easy procedure. XAMPP installation instructions are provided for Windows and Mac.
Installing XAMPP on Windows
- Go to www.apachefriends.org/en/xampp-windows.html.
- Scroll down to the Download section, shown below:
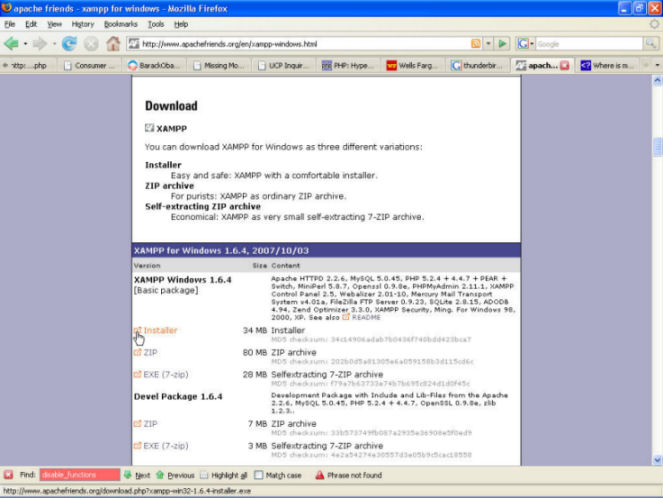
- Click the Installer link under the Basic Package listing to download the installer version. The downloaded file is named xampp-win32-1.6.4-installer.exe. Save the downloaded file on your hard disk or desktop.
- Navigate to the location where you saved the downloaded XAMPP file.
- Double-click the file name. The Installation Wizard starts.
- Read and click through the next few windows until the Choose Install Location screen appears, as shown below.
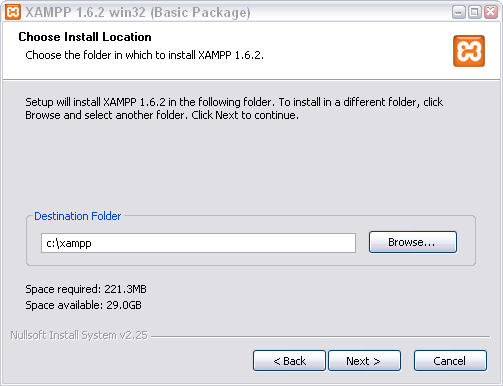
It's best to accept the default location (c:\xampp) unless you have a really good reason to choose another location. If you are installing on Vista, you cannot install in the Program Files folder because of a protection problem. Also, PHP sometimes has a problem if it is installed in a folder with a space in the path, such a Program Files.
You can click Browse to select another install folder. When you have chosen the install folder, click Next. The XAMPP Options screen appears.
- Under the "SERVICE SECTION", check Apache and MySQL, as shown below. This installs the tools as Windows services.
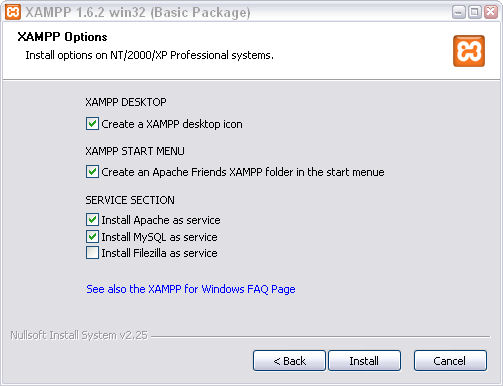
- Click Install. The installation process takes a few minutes to complete. As the installation proceeds, you will see various files/components being installed on your system, in the location you specified. A status bar shows the installation progress. When the installation is complete, the Installation Complete screen appears, as shown below.
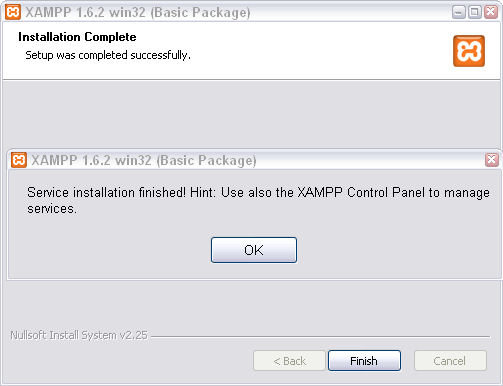
A small panel with messages may appear, as shown. If so, click OK.
- Click Finish.
To test your installation, open the XAMPP control panel. When the control panel is running, its icon ![]() is in your system tray. You can click the icon to open the Control Panel. If you do not have the icon in your system tray, you can start the Control panel from the start menu by choosing the following:
is in your system tray. You can click the icon to open the Control Panel. If you do not have the icon in your system tray, you can start the Control panel from the start menu by choosing the following:
Start->All Programs->Apache Friends->XAMPP->XAMPP Control Panel
If you attempt to start the Control Panel when it is already running, as shown by the icon in your system tray, an error message is displayed.
The open Control Panel with Apache and MySQL running is shown below.
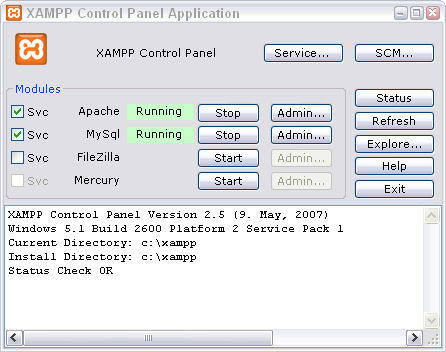
This status means your development environment is ready for work. If the status of Apache and MySQL is Running but the SVC box is not checked, you can use Apache and MySQL, but they will stop when your computer is shut down. You will have to restart them in the XAMPP Control Panel every time you start your computer. It's better to run them as a service so that they will start automatically whenever your computer starts.
Installing XAMPP on Mac
If you're a Mac OS X user, Apache, PHP, and MySQL are already installed on your computer, but not activated. If you have expertise in its setup, which includes activating the software, accessing hidden and locked files, and editing a configuration file on your own you can use the pre-installed system. Some setup tips are found at foundationphp.com and other sites. You will also need to download and install phpMyAdmin on your system separately.
If you prefer, you can use XAMPP. It installs everything in one procedure and is as easy to install as any other software application you're familiar with. However, you need to be sure that the preinstalled software packages are not activated.
Follow along now to set up your development environment with XAMPP.
- Go to your computer's System Preferences and click the Sharing button. In the dialog that opens, make sure that Web Sharing (called Personal Web Sharing in earlier Mac OS X versions) is unchecked. This is very important. If you have this box checked, the OS's installation of Apache and PHP will interfere with your use of XAMPP.

- Go to www.apachefriends.org/en/xampp-macosx.html.
- Scroll down to the Download section, shown below:

- Click the first XAMPP MacOS X link which says Installer Version below it. Download it to your desktop. (Note that your version may be different than the one in the above screenshot, as the software is updated regularly.)
- Double-click the fully downloaded package to begin installing. When the installation is complete, you'll see a folder called xampp in your Applications folder. (Notice that the steps on the XAMPP site tell you to use your Terminal to install and run the application. That's not necessary unless you like writing code in the Terminal. Just use the steps in this lesson and you'll be just fine.)
To test your installation, go to the xampp folder in your Applications folder. Double-click the XAMPP Control Panel icon. When the Control Panel is running, its icon is in your dock. You can click the icon to open the Control Panel. The open Control Panel is shown below.

Click Start next to Apache and MySQL to get them running. You'll see what's running in the Output field. When Apache and MySQL are running, your development environment is ready for work.
Now type the word localhost into your browser's URL field. If you see an XAMPP placeholder page, it's working.